
How to make a Geode Table
- Jun 17, 2018
- 13 min read

Well, this Geode table project has been quite the teacher both in terms of DIY learnings,
but also patience and perseverance. You see, I set out to make this table for a contest hosted by Quikrete. The winner would receive a cash prize, bragging rights and an all-expense paid trip to the Haven Conference. It’s a DIY conference for bloggers and makers. I’ve been wanting to go for several years, but haven’t been able to afford it. This year I have even more reason to go because my new ministry partner, Christine Chappell at That Upcycled Life and the person who introduced us, Francine Melder of Designer In You paints, will both be there. We thought it would be a great chance to finally meet in person and do some dreaming and planning. So that was my plan… to make something wicked awesome, win and go to the conference. Well, it didn’t exactly turn out that way.
This project has been fraught with failures… one right after another. The first failure was in making the actual concrete table. I had first come up with the idea of making a table that had a waterfall through the middle, but given my novice skill level in this area, I decided to ratchet it down a bit and do something smaller. During that time, I was also starting to dabble in paint pouring. (More on that later, but you can find some great content on Facebook groups and YouTube videos if you want to learn more.) Anyway, I got the idea to combine the two concepts and make a geode table out of concrete.
To help get me started, my husband found me an article on how to attach hairpin legs to a piece of cemente. Unfortunately, in classic Heidi fashion, I didn’t read the directions. You see my hubby John is an engineer and reads everything, absolutely everything, word for word, especially when it comes to instructions and contracts. Don’t even get me started with how long it takes us to sign legal documents!!!! I am so very thankful for him though, because I am just soooo the opposite. I absolutely LOATHE, and I mean LOATHE reading and following written instructions, which I find totally ironic since that is what I am writing right now! Anyway, all that to say, I did NOT read the tutorial instruction and have that to thank for my first failure!
So, what was my failure? I poured the concrete mix, let it dry and then tried to flip it over so the table would dry level. When I picked up the metal board underneath to flip it over, the cement cracked into hundreds of pieces! I cried. And maybe said a few cuss words too.
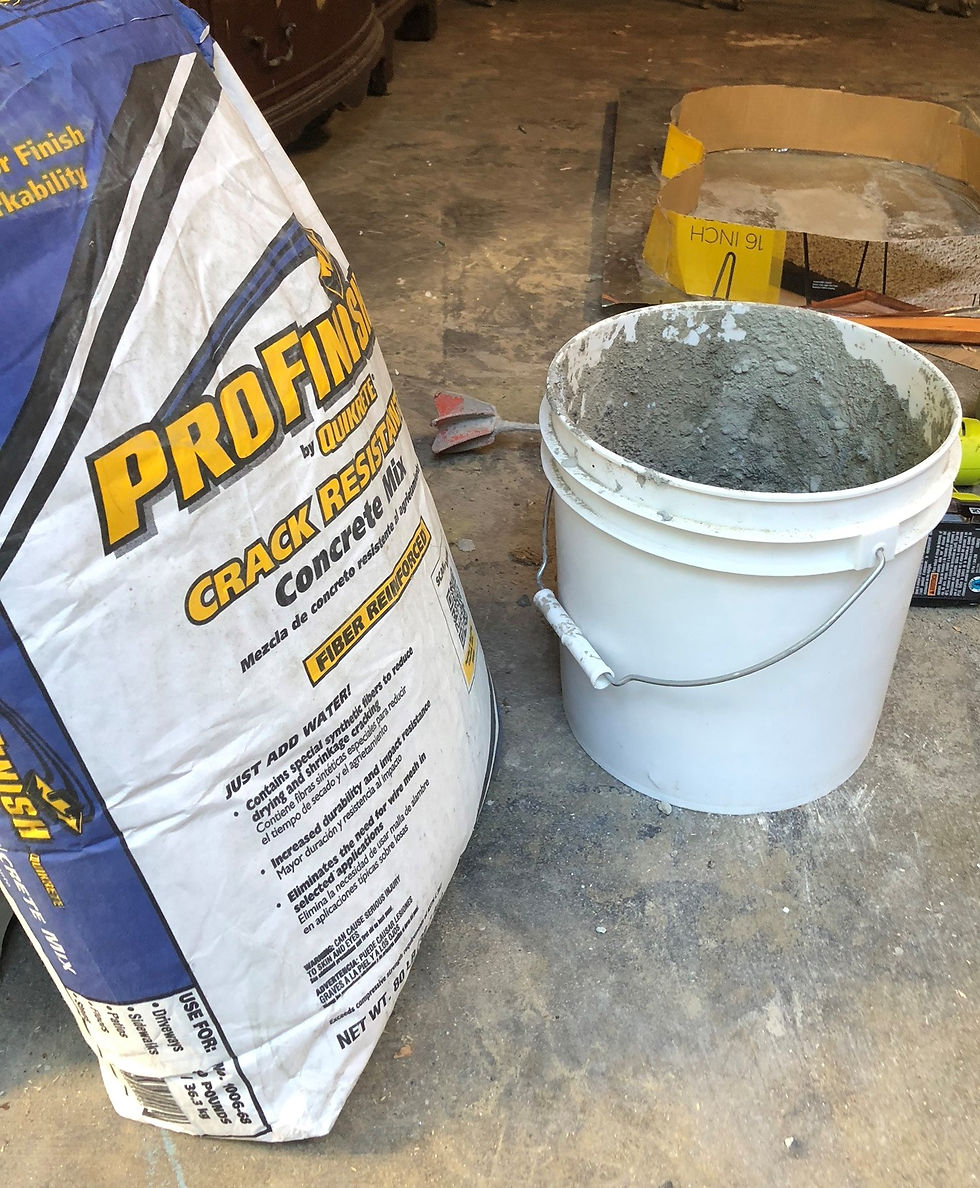
Even so, I was determined to win, so I decided to try again. So, I forged head and was determined to get some help this time. To do so, I mentioned my issue in a paint pouring Facebook group and a very kind gentleman who makes things from concrete, schooled me in “all things concrete”. I found out that all concrete is NOT created equal and that was my problem. Initially I bought the cheapest bag of mix I could find. I later found out that what I really needed was a pro-mix that was crack resistant AND included these long fibers in the mix to help fortify the cement. My new friend also told me that the longer concrete cures, the
stronger it becomes. That meant, keeping my cement moist for several days while it dried. This was quite a different approach compared to the One-hour quick dry cement I used initially. Don’t buy that kind. Instead, per his advice I bought (and so should you) Quikrete Pro Finish Crack resistant Concrete mix. Fair warning though… its HEAVY and you should ask for help getting it off the shelf and into your car. One bag is 80 lbs!
Well, onto part 2. Yup, that part failed too. You see, I just love blues and greens, and thought I could make a pretty geode by combining those colors in a neat palette. Folks in my paint pouring Facebook group always advised beginners to practice before committing paint to a piece. Of course, in classic Heidi fashion, I didn’t listen and just “went for it”. Well, guess what? I failed. Yet again. I could tell immediately when my husband gave me a disingenuous, “that looks nice honey”, response when I asked him what he thought.
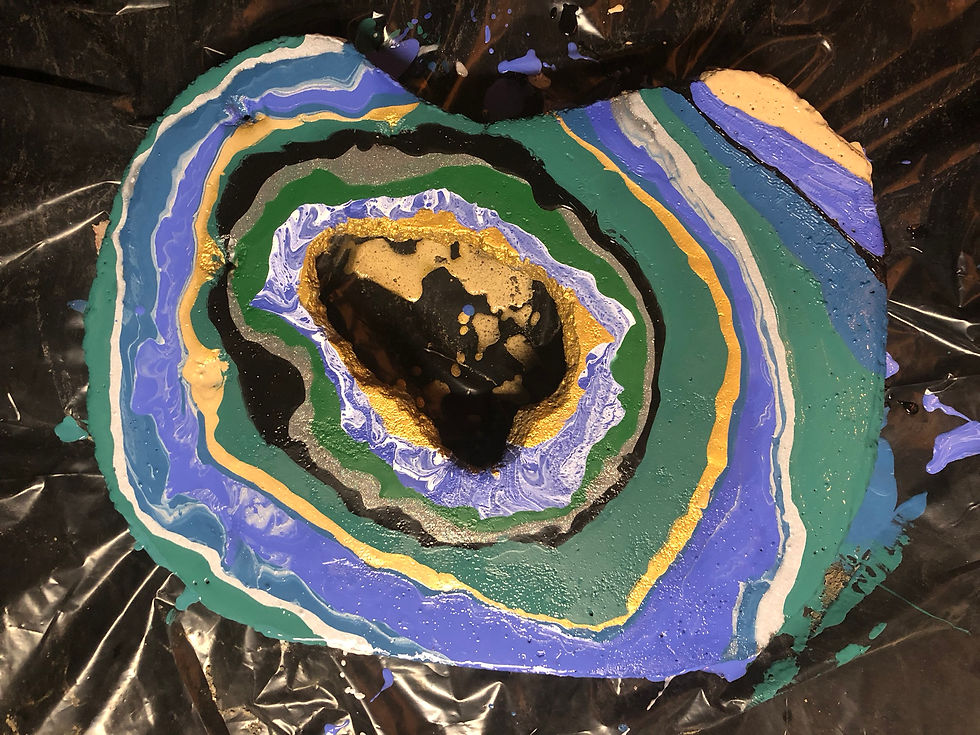
My colors sucked and I knew it. Time to start over yet again. (Just so you don’t get confused, in the tutorial below, you will see some video clips on how to pour the paint rings, but it’s with this old color scheme.) Anyway, after looking at real Geodes more closely on-line, I chose colors that more closely aligned with the real thing. Thankfully, because its paint, I was able to just paint right over my old design and start something new. Kinda like us humans, right?
Ok, so after two major fails, I was so super happy with how my final table top turned out, that I posted it on Facebook. That post turned to be my most successful posts ever. Like evah!! Now all I had to do was write something up with pics/videos and submit it to the contest. Simple right? Well, not so fast.
Get ready for epic failure #3. So, I wrote up the submission, said a prayer and then pressed “send” on my email, or so I thought. I have legit memory issues due to disease and must have forgotten to check to make sure it went out, so when I didn’t get a confirmation email a few days later, I started to worry. I emailed the folks over at Quikrete only to find out that they never got my submission. AHHHHHHHH!!! I don’t usually beat myself up too much for my stupid memory, but with this one I did. I cried. Hard. Again. It’s at moments like these that I get so damn angry at my disease and the very real impact it has on my life. I get especially mad when it affects my family or the things I love. This was one of them.
Well, hell. I had a completed table and a ton of people who wanted the tutorial, so I had to get back to work. I did and here’s the tutorial to prove it. While I’m not sure what I’ll do with the table, I do know and am thankful for the new fans, customers and “Revivers” I gained in the process. I also LOVE the table (can’t forget that!!!)
Take aways? Read the darn instructions and never stop trying. Failure is a great teacher.
So, without further adieu, here’s the tutorial. If you have any questions or need help, please don’t hesitate to reach out on Facebook or by email. And, PLEASE send me pics of your finished project. I would love to see it!
Supply List:
Cement Table Base
Metal Sheet or Piece of plywood
Mixing tools: drill with mixing attachment , bucket, spade, and measuring cup for water
Gloves
Scrap cardboard
Duct tape
Non-stick cooking spray
Metal hairpin legs height of your choice
T-nuts with matching bolts (same size as each other and as the holes in hairpin legs). You’ll want to make sure that the bolts that you pick out for the table go deep enough into the cement not all the way through.
Jig saw
Plastic straws, ruler and scissors
Geode Paint Finish
Selection of 3-5 acrylic paints (8 oz size) including gold and/or silver
Stir sticks
8 oz Plastic CLEAR cups (20)
12 oz plastic cups (clear or colored)
Paper towels and drop cloth
Hair dryer
White, gold and black paint pens (fine or medium tip)
Various crystals https://amzn.to/2xYubBS and https://amzn.to/2xTVo91
Hot glue gun and hot glue
Patience!
Making the Table Base
Step 1: Decide on the shape and size of your table
Cut a piece of wood or metal sheet about 25% bigger than the size you want for your table.
Choose a geode shape that you like from the internet. Draw that shape on your piece of metal or plywood.
Draw a hole in the middle of the geode (if you choose to do one). Make sure that the hole leaves enough room for your table legs.

Step 2: Make your mold
Cut your scrap cardboard into long strips of about 20 in long by about 2 inch deep (or however deep you want your tabletop to be - I suggest at least 2 inches).
Using duct tape, tape the cardboard strips along the edges of the geode you drew creating a dam on the outside and on the inside hole.


Step 3: Prepare your molds surface
Spray your metal or wood surface lightly with some nonstick cooking spray. This will help keep the cement from adhering to the wood or the sides.
Step 4: Making a 'table leveler'
I wanted to make sure that all of the table legs were level (no wobbles!) So I decided that I would put all the legs on the same plane by temporarily attaching them to a board and then placing the board upside down on the cement (on the surface that will be the table bottom). Keep this board in place until the cement hardens enough to gently remove the bolts without moving the T-nuts that will be recessed in the cement (see steps below).
Cut out a similar geode size and shape (without the hole) out of your hobby particle board, but make it slightly smaller than your actual Goede shape so it fits inside the mold and on top of the cement once you pour it. I used a jigsaw for this.
Take the hairpin legs out of their package.
Using the piece of particle hobby board matching geode shape that you just cut, pretend it’s the table and place the hairpin legs where you want them to be. Make sure they are placed equidistant from each other so the table legs support the table equally on all sides.
Draw a mark on the board with a sharpie where you're going to put the bolts through the hairpin legs and into the wood where each of the four legs go.
Set the legs aside and drill holes into the hobby wood where you left your sharpie marks. Make sure you use a drill bit that matches the size of the bolts that you will be using to anchor your table into the cement.


Step 5: Preparing the T-nuts and bolts for the cement
Take the bolts and push them through the holes that you just drilled until they are all the way through and then thread the T-nuts onto the bolt until the threads start to stick out of the other side of the nut (DON’T tighten your bolts all the way to the top (flush) with the underside of the board). For my table this left about a ½ inch between the bottom of the board and the top of the T-nut, which will put the T-nut bottom about an inch into the cement.

To be sure, measure the length of the bolt from the top of the T-nut to the bottom of the hobby board and write this number down as you’ll need it in the step below. As mentioned, for a 2 inch table it should be about a 1/2 inch or less.
Now cut a piece of straw to the length in the above step (12 times - a piece for each bolt on the table; 3 bolts per leg).

Once cut, remove the T-nut and put each piece of straw over each bolt. Once the straw is in place, screw the t-nut back on. It should sit just at the bottom of the bolt again.

Take some of your duct tape and secure the bolts to the top of the particle board (not pictured), so they don't come off when you're pushing the long end of the bolt into the cement. Doing it this way ensures that all four t-bolts will be into the cement equally, so that your table legs are all the same length from the bottom of the table. This will help prevent a wobbly table .
Spray the underside of your hobby board after your legs have been attached.
Step 6: Mix your cement
Mix up your cement in bucket according to the directions on the package. I use my drill attachment because that's easier than doing it by hand.
Pour the cement into your mold and spread out until it gets to top of the cardboard mold. Smooth it over with a spatula and then lift up and tap the whole mold on the ground gently so it distributes the cement evenly.
While the cement is still wet, place the 'table leveler' exactly where you want it to be on the cement table. Push down hard. You want the particle board to be flush with the top of the cement. You also want the T-nuts and bolts to be pushed about half way into the wet co. Push down on the bolts themselves from the top if need be. Also, make sure that your hobby board is pushed down fairly level. All of this will ensure table legs are securely attached to the cement table in a secure and level manner.

Step 7: Waiting
Now the hard part, waiting. This type of concrete takes several days to cure, so I would drape a damp blanket over top so it cures evenly and slowly. The more slowly it dries, the stronger and more stable the concrete will be.
Step 8: Remove the legs
After it has cured about 24-48 hours, feel free to gently unscrew the table legs from the table. The bolts should come right out from the straws easily. If you start to feel like it's pulling out of the cement too easily, stop and let it cure longer. The Straws will stay in the cement. Do not remove them. Set aside the bolts and remove/discard the hobby board.
Step 9: Remove the mold
Once it is completely cured and dried, you can remove the cardboard and metal/wood.
If there’s any cardboard residue, slight sand off with a sanding block or paper
Turn over now you're ready to paint on the smooth side!
Painting Your Table (the fun part!)
Step 1: Choose your color scheme for your geode
I like to use pictures on the internet for my inspiration stay in the same color family... All Greens all Blues or all pinks.
Choose your metallic color or colors i.e. whether you want to go gold, silver or something else or both! If you’re doing this for the first time, it’s helpful to practice on a cheap canvas or piece of wood with the colors in the order that you would like because once you put it on the cement you're committed (ask me how I know this…)
Step 2: Drawing your outline
Once you're ready with your paint colors, make sure your cement piece is turned over (smooth side facing up) and place it on a drop cloth.
Use a pencil to draw a shape around the center hole. Be sure to follow the natural lines and shape of the hole you made in the center. Then keep drawing concentric shapes in various widths around the geode from the inside to the out, until you get to the outer edge. When done you should have a bunch of rings drawn on your cement. these rings are just a guide so don’t fret if you don't pour your paint exactly within these lines. They are just a guide.
Step 3: Mixing your paints
Now mix up your paints with the Floetrol. Add in about a one-to-one ratio in each of your 8 oz clear cups. I use a sharpie to draw lines on the cups so its the same each time- one color per cup. Stir well.
Then if you choose to mix your colors as in traditional paint pouring mixing method, use the larger cups to do that. I often mixed a metallic paint with a solid color for a cool, natural look. Again, experiment with the paints to get the look you want. Practice is recommended before pouring on your cement, although you can always pour over it again if you don’t like it. That’s the beauty of paint!
Step 4: Ok, ready to start painting???
Start pouring your first color on the inside ring and let it flow down wall of your inside hole. I like using a metallic because it a good base for the crystals I’ll add later. If you feel like it's not giving you the shape you want feel free to pick up the cement and tilt and turn it until you get the desired shape.
Let dry a few minutes. I use a hair dryer to expedite this process and give the paint some natural looking motion as an added effect.
Once the edge of the paint is dry, proceed to your next pour. This edge will create a dam so the paints don’t mix you can repeat this process until you are completely done pouring the rings of your geode on the cement table. **a note about Glitter. I add glitter at a later stage because if you put glitter in paint, it will lose its shininess.
Once your entire cement table is covered completely with paint, wait for it to dry for 24 to 48 hours. More patience required!
Step 5: Adding glitter and fine details! Instead of adding glitter to the resin in the final step, I adhere it to the paint
Choose your glitter and then lay down a very thin line of glue (Elmers is fine) around the edge of two paint colors. Sprinkle on glitter, blow off excess and let dry. Repeat with other colors and line widths. Get creative!
Use you paint pens to draw lines, again between paint colors to add natural definition to the geode.
Now to add crystals! Choose varying side crystals and have them out and ready. I like to glue them on with a combo of hot glue and e6000 glue. The hotglue gets it in a place, fast, without sliding and the e6000 keeps it there for the long haul. I only put crystals in the holes and not in the paint, but do whatever feels right to you. Let dry completely overnight.
Once completely dry, I VERY GENTLY turned the table top over and carefully spray painted the edges of the table with gold. I also sprayed the bottom side of the table for consistency. Once dry, flip back over and you’re ready for resin.
Sealing and adding shine with Resin
Step 1: Setting up for surface for resin pouring application
Resin is VERY sticky and is very hard to take off a surface, especially after it dries. That said, make sure your surface is covered in a plastic drop cloth that you can throw away afterwards.
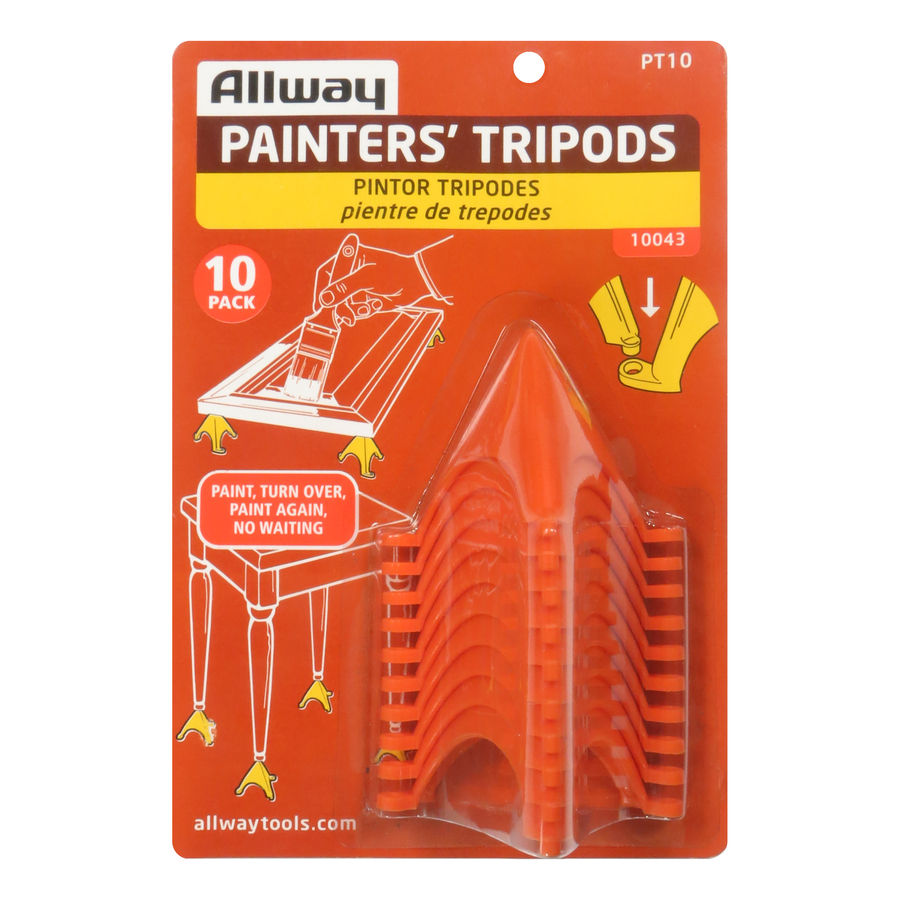
Set your table top on blocks or use the painters pyramids (listed in the supply section. I absolutely LOVE these!) Make sure the table is even and level.
Step 2: Mixing and pouring your resin
Mix your resin according to the instructions. Again, I use the clear plastic cups with pre-marked lines to measure the ingredients.
Once mixed, pour the resin over the top of the table from the inside out avoiding the crystals in the middle. Take a non-stick spatula to smooth the resin if its uneven or if you have bubbles. Keep pouring until your table is covered. Use the spatula to apply extra resin to the sides of the table that are still bare.
Now wait… like a long time… like days… for it to COMPLETELY cure. If you need a second coat of resin, you can follow the instructions on the box for when its best to do that again.
Assembling Your Table
If you don’t like the color of your hairpin legs, spray paint them like I did. Because they’re metal, you’ll want to first spray them with a clean metal primer. Let dry and then spray paint with the metallic paint I recommended in the supplies section (not all metallic paints are created equal!)
Once completely try, turn over and attach your legs by screwing the bolts into the T-nuts. If you find that any of the legs are uneven and the table wobbles, just add a washer onto the bolt.
Turn your table over and give yourself a HUGE hug! You did it! Congratulations!!!
Now go share a picture of it on my page at facebook.com/reviveheartandhome


bl


Comments